
This week I'm going to show you how to make a super cool Super Hero Costume that you can wear yourself or give as a present to a dad or a granddad for Father's Day. Better still you could get together and make a costume each.

It has an eye mask, a cape with a logo and wristbands with imaginary gadgets. Mine is made out of a pink 'T'shirt as a lot of my old 'T'shirts are pink, but of course you can use any colour 'T'shirt you like!
This is the kind of present anyone's dad would love. He could wear it while he has a special Father's Day dinner, playing with you in the garden or just watching TV.
If you don't understand something I'm asking you to do maybe a type of stitch or how to tie a knot in your thread, check out the Sewing Basics post in the GETTING STARTED! section at the top right over there. --->
You will need:


- An adult size 'T'shirt. The one I'm using is a UK size 12 but the bigger the better really. Ask someone if they have an old one you could use or buy one very cheaply in a supermarket or chain clothes shop.
- Scissors.
- A largeish roll of tape for drawing around.
- A marker pen.
- Some paper.
- A piece of felt about 14cm by 20cm that matches your 'T'shirt for logos.
- Another piece of felt about 10cm by 20cm, any colour.
- Thread to match your 'T'shirt and logo felt.
- A needle.
- Some pins.
- Two safety pins.
- A ruler.
Step 1.
Prepare the 'T'shirt.
The diagrams below show you how to cut up the 'T'shirt. In diagram a. the dotted lines show where to cut.
- Cut in from the neck along the shoulder seam.
- Cut the sleeves off around the seam.
- Cut down the side seams.
- Cut the hem off the FRONT piece only.

These are the pieces you should have:

The eye mask.
Fold a piece of paper in half and put it down on the table with the fold at the top.
Draw around the roll of tape with a bit slightly overlapping the fold of the paper like in the picture below.

Cut it out and open it up, this is what you should have:

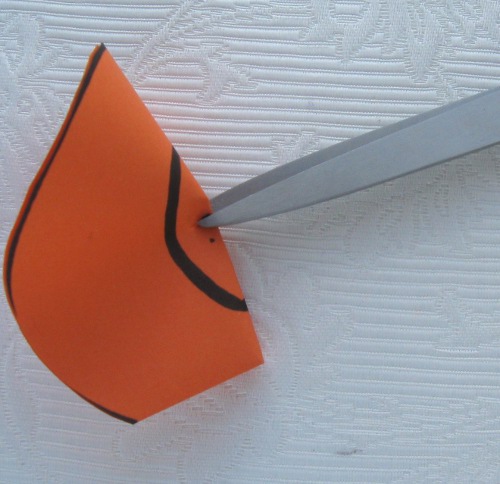
Fold it up again, put the fold facing the right like mine in the picture below. Snip a slanty line from the bottom corner. This is to make room for the nose of whoever is wearing it.

Open it out again and it should look like this. If you aren't happy with the shape, trim it a bit to get it how you want it. It's a good idea to fold it up again before you trim it as then you get a symmetrical shape.

Put it on your face and try and figure out where your eyes are. I put a finger on where I thought the middle of my eye was while I had it on my face, then put a dot where my finger was.
Then I drew an eye shape around that dot.
Fold your paper mask in half again like in the picture below. We're going to cut both eye holes out at the same time, so they'll be symmetrical.

Snip in to the eye shape like this to make a hole in the middle of it so you can cut it out easier. Cut around your marker lines.
Put it on to your face. Can you see properly? If not then trim the eye holes 'til you can. Refold the paper over to cut both eyes at once so they are symmetrical.
Here's what it should look like once you've cut out the eye holes:

We're going to make the mask out of felt and then cover it with the 'T'shirt material. This way the mask stays in shape when it's on your face.
Pin the paper mask to about 20cm by 10cm of any colour felt, draw around it with the marker, don't forget to draw the eye holes!

Cut this out. Here's what you should have:

Cut the hem in half to make two straps like these:

Pin these to either side of the felt mask at the top of the eye holes.

Thread your needle with the thread that matches the 'T'shirt and use doubled thread. I'm using green to sew with just so that you can see what I'm doing. Sew with over stitch all around the area where the straps overlap the felt like this:

Pin your paper mask pattern to a bit of the front 'T'shirt piece, draw around it, make sure you remember to draw the eye holes on. Cut around the lines.

Pin it on top of your felt mask.

Using the thread that matches the 'T'shirt and doubled thread, sew around the edge with over stitch to hold the two pieces together.


There's your eye mask done!

Step 3.
The cape!
Get the back piece of the 'T'shirt and lay it flat on the table. Cut a line from the bottom corner to the shoulder like in diagram c. below. This makes the triangle cape shape. Don't worry if it's a bit wobbly, the edges of the material will curl up and nobody will notice.

Diagram d. below shows what we are going to do to finish the cape.

Sewing on the safety pins.
Open up the safety pins so that you know which side stays shut. Sew the side that stays shut to the underside of the cape shoulders with a few stitches. Sew one safety pin to each shoulder.
These safety pins can pin on to the shoulders of whatever top you are wearing.
Here's a picture showing you how to sew them on:

The logo.
My Dad's name is Ed so I made a Super Ed logo. I used bubble writing to write the initial letter E of his name inside a bubble writing circle. You can make your logo whatever you want it to be.
I recommend starting with a basic bubble shape like a circle or a triangle or a square and then drawing something inside it. Make sure the thing you draw inside touches the edges of the outer shape as we're going to cut out the gaps.
Here's mine:
Cut out your design and pin it on to your logo felt. Pin it so you don't waste any felt. We'll be using the rest later on. Draw around it with a marker.

Cut the felt logo out and go over any lines you want to stand out with the marker pen.

Pin the logo on to the top part of the cape like this:

Sew around the edge with over stitch. You can make the stitches quite big so it doesn't really take that long.

Sew around the inside of the logo, around the letter or design. Sew any loose edges down.

The cape is done!
Step 4.
The wristbands with imaginary gadgets.
From the front part of the 'T'shirt, cut two triangles about 16cm long 10 cm wide like these:
These should be big enough to fit around your wrists. Check them and cut them down a bit if they are a bit big.

Cut out some shapes from the remainder of the logo felt and pin them to the wristband rectangles. You can use any shapes. I've got two squares here. These are going to be buttons on my wristbands that shoot out nets to catch people in.
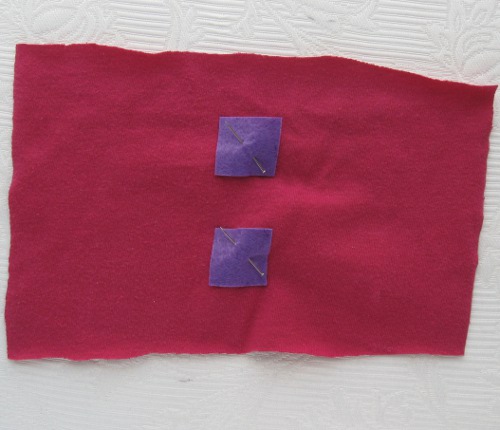
This rectangle is a sliding button that turns the sun up and down, so it can be light or dark whenever I want. Woo! Imaginary gadgets are fun!

Sew them down like you did the logo, with over stitch around the edges.

Fold them in half with the buttons on the inside and pin them like this:

Sew them up with over stitch along the open edge, don't sew up the arm holes.

They go on like this. Pew! Caught you in a net!

And there we are! A super Super hero outfit!
What do your imaginary gadgets do? Did you make an outfit for someone you like? Did your dad wear it?
Show me here: http://www.flickr.com/groups/sewingtuesday/
To Sewing Tuesday and beyond! Zooooom!
this is great, Holly. Finally found your card with your details on... Good luck with it all - we'll be checking in from time to time.
ReplyDeleteHelen & Oakley
Hi! Great! Glad you found me. :D Hope you are all doing well. Hi Oakley! *wave*
ReplyDeleteYou create magic! Thanks for posting. (I'm not anonymous-it's me-"porcupinemamma"/Lyn from Instructables)
ReplyDeleteNice idea to making superheroes costumes for kids.Thanks for this interesting idea.
ReplyDelete